Terrains:Quickstart guide
This guide is a crash course in terrain making for BeamNG Sandbox. If you have further questions feel free to ask over on our forums. I have added notes in italics about issues you should keep in mind when working.
Your first terrain should be small and manageable, I recommend starting at 512m x 512m or 1024m x 1024m if you are feeling ambitious. If you start too big it is easy to be overwhelmed and give up.
Initial Idea and Planning
You probably already have an idea of what you want to create, the next step is to gather reference for your terrain. Photographs or maps of the place or a similar place is essential. Get as much as you can, it will help you to create a believable world. Some concept art of the terrain can help you to understand what you'll be making, though at this stage you should stick to mood pieces (show the kind of place, don't worry too much about layout or specifics).
Next comes the planning of the level. It is important to have a good plan to work from when building, so you should create a bunch of different layout sketches and experiment with different ideas of how to fill your world to make the best use of the available space. Keep in mind ways to block the user from leaving the area (cliffs, ocean etc), guide them through.
When you have a general layout in mind begin to plan out roads, buildings, forests and rivers.
|
|
Important: Make sure you get a good idea of scaling, widths and angles before planning all your roads. Create a blank terrain and paint some short roads on it, when you're happy with how sharp the corners are and how long the straights are either zoom all the way out until the square of the terrain fits on your screen and take a screenshot or export the terrain and make a copy of the road layer. This is a vital piece of reference due to how hard it is to work out scale from such an abstract thing as your a pencil line on a piece of paper. Without it you could end up with very frustrating or boring roads. |
At this point you should build the level basics (set up a folder, make the .mis file). You can use this to test your assets and make sure everything is coming together.
Asset List
It is very important to have an asset list before jumping into level building. This will enable you to work your way through them one by one and help to unify the look of your level. You can't plan everything, but try to get an idea of what you'll need, for example:
objects
- 6-8 limestone rocks
- 5 palm tree variations
textures
- grass
- grass2
- dirt
- rock
- leaves
Create Assets
The next part is to build and cross those items off your list, make sure you test them in your level as you build and make any changes you need to.
It is advised that you name your assets according to your level or specific style such as “bobstrack/art/bobstrack_buildings/bobstrack_pitbuilding_01.dae”, “ bobstrack/art/bobstrack_trees/bobstrack_bigbeech_03.dae”. This will make it easier for your or someone else to combine these assets with others without having to manually merge material files. Keeping multiple levels up to date which use the same assets will be much easier as well.
Using stock assets
To use stock assets in your level copy the files from the level art folder into your level folder art folder, making sure that you keep the original paths intact (“YourLevel/art”).
Next you need to edit their material files to fit your level folder structure. I recommend using notepad ++ to automatically replace the paths, just make sure you don't break anything in the process (be as specific to the thing you want to replace as you can be; replace “bobstrack/art/” with “newterrain/art/” instead of just “bobstrack”).
For conflicts (such as taking assets where both use a “art/shapes/buildings/” folder you will need to manually combine their materials/cs files.
Roads
Roads are made using a number of things. First, you need a heightmap with texture. On top of this heightmap you place a spline road (tiled texture mapped to a plane above the ground). The ends are sharp so you need to place decals to blend segments.
|
|
Important: Torque3D cannot handle two different decals placed over each other, or two different spline roads, they will flicker. You can place a decal on top of a road spline though. |
To create a road:
- In the map editor, you will see two road makers: Mesh Roads and Road editor. A mesh road is a 3D road which you can set side textures, bottom textures, and top textures. This option is nice to make bridges without support underneath. (No support is needed) The road editor is where it places almost a decal on the terrain and it is not 3D. This takes the form of the terrain, and follows the angles of it.
Tips for making roads
If you have a map that is not flat, but sound, your vehicle may not be able to handle the side inclination of the map. I would suggest that after you import your height-map, you choose the square shape terrain editor. Once you do this see what the width of your road is. Say the size is 10, set the brush size to 10. Then slowly carve out a section for the road to be placed in. Go over this with the flatten tool, but don't keep the pressure on 100, move it down to about 30. Now you can place your road on top of this.
Vegetation
Vegetation should be created using a 3D modelling program and then placed into a terrain using the forest editor tool. To make the foliage move realistically in the wind you need to use vertex painting on the areas you want to sway. The colours are as follows:
- Red – Branch movement, large, slow, vertical movement to simulate a branch moving in the wind.
- Green – “Delay”, used to make the sway less artificial, the amount of green should ideally be random.
- Blue – Detail movement, small, fast, horizontal movements to simulate leaves shaking.
- White – Full movement
- Black – No movement
Keep in mind that each vegetation object can all be tweaked individually to adjust the power. Also, make sure things that shouldn't move are black or your tree trunks are going to look really strange.
Blender work-flow
Blender doesn't allow individual channel painting, so to do vertex painting it is advised that you start with black and use “add” under vertex painting to add the 3 colours in the amounts you want. I advise you make tree samples and do the vertex painting then before copying the samples across your vegetation (test it first and get it right, it's very difficult (nearly impossible for complex trees) to edit later on.
|
|
Exporting from Blender 2.67 will cause strange behaviour in-game. If you are running this version, update. |
Build Heightmap
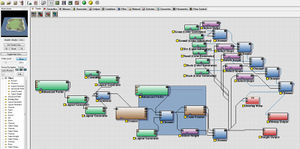
The heightmap will be the foundation for your terrain, I recommend using a procedural generator like World Machine 2, L3DT or Geo Control 2. This takes some time to get right (and if you use a generator like World Machine it is important to get it right before moving to manual editing) but is very important for the final terrain.
At this stage it doesn't need to be perfect (roads don't necessarily need to be placed at this stage), just get the framework for your terrain completed.
Manual Heightmap Elements
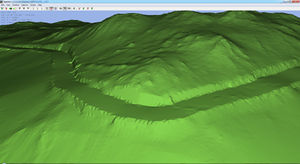
World Machine isn't ideal for making small changes, it is better to do that sort of thing by hand. Load up your heightmap into BeamNG and then begin marking out where the roads will go according to your layouts you did earlier. I find working with different texture layers is the best way to go about this (so, the base might be grass with dirt representing dirt roads, rock for asphalt etc).
When your roads are marked jump over to your sculpting program and start sculpting them into your terrain, ramp tools are good for this; you don't want cars to slide off the road down the hill.
|
|
Important: Torque3D's terrain export is only useful for texture layers, the heightmap may be exported with different settings from your sculpting programs which will cause the height of certain areas to be different when re-imported into T3D. To be on the safe side either only use T3D's internal tools or only use an external program; don't export from torque, edit (external), import, edit (internal), export. |
Building Terrain
Your heightmap is done, the roads are carved into it and it's time to place the assets you have created.
|
|
Important: As of this writing there is an issue with static objects which can cause significant performance degradation when in large numbers. If you can avoid using static objects and instead use the vegetation it can avoid this problem. This has nothing to do with the actual meshes or textures, just how they are placed. Load the meshes into the vegetation system (F8) and place them using brushes. |
Level Basics
Below is a list of basic items your level should have as well as recommended settings.
- Scatter Sky
- SkyBrightness: 40 (ambient light and sky appearance)
- brightness: 1.3 (sun brightness, 1 is often too low)
- Shadow “texSize”: 1024 (shadow resolution, 2048 is a huge performance hit, minimal FPS gains w/512)
- overDarkFactor: 12000 4000 1000 200 (fixes issue with light shadows near the base of caster)
- shadowDistance: 300 (maximum shadow rendering distance)
- shadowSoftness: 0.25 (blurs edges)
- logWeight: 0.97 (makes shadows sharper close up at the expense of distant detail)


