License plate tutorial
This tutorial will show you how to create proper license plates for BeamNG.drive. (From version 0.5.6.0 and above)
Requirements
For this tutorial you just require an image editing tool and a text editor. We'll use GIMP and notepad++ for this tutorial.
You can either use this file ( File:License plate template mod.zip ) or make everything from scratch to create your mod. The template contains a working license plate mod which you can modify as much as you like.
If you're using it you can skip the part Prepare the folder structure of this tutorial. Just drop it into the mods folder and unpack it via the mod manager within the game.
Introduction
For a proper license plate mod, it's necessary to have at least three files - a jbeam file, a json file and one texture file.
The jbeam file contains all relevant information about your license plate mod and indicates the file path of the corresponding json file.
Whereas the json file is implicates the paths for all textures files you're going to use in your personal license plate mod.
Furthermore, you need to have at least a background texture for your license plate.
Creating a license plate mod
Prepare the folder structure
Go to the following folder C:/Users/%USERNAME%/Documents/BeamNG.drive/mods/unpacked and create several folders to match up the corresponding file path for license plates.
In the end you should have a file path like this: C:/Users/%USERNAME%/Documents/BeamNG.drive/mods/unpacked/username_mod/vehicles/common/licenseplates/username_license_plate/
Change the bold part of the path to whatever you would like to have. But please make sure that you're using unique names to prevent problems with other user's or original content. (e.g. 'California plate' is not a proper name)
|
|
username_mod equals the zip file name of your mod, hence it will be the name which is displayed in the mod manager within the game. |
Creating the texture
Open up GIMP or any other image editing application.
We are going to create the background for the license plate now. The texture for the background has a resolution of 512px x 256px - please keep this resolution.
Use this template file ( File:License plate texture template.zip ) to create your own personal background for the license plate. Keep in mind to create one without the text on it. Text will be generated in another place and will be blended in the background texture.
Once it's done, export your file as a png in the folder you created before and give it a unique name as well.
Create the json file
After finishing the texture, we'll create the json file to create the connection between the license plate and the texture.
{
  "name" : "username_license_plate",
  "version": 2,
  "data": {
    "gen":{
      "pattern" : ["temp-%wt","eg-%wt","foobar-%wt"],
      "patternData":{ "wt":["A","B","C","1","2","3"]}
    },
    "format": {
      "30-15": { //US
        "size" : {"x" : 512, "y": 256},
        "text" : { "x" : 0.5, "y" : 0.65, "scale" : 1, "color" : "rgb(187, 61, 0)", "limit" : 8},
        "diffuse" : {
          "spriteImg" : "vehicles/common/licenseplates/default/platefont_d.png",
          "backgroundImg" : "vehicles/common/licenseplates/user_license_plate/user_license_plate_background_d.png",
          "fillStyle" : "black"
        },

        "bump" : {
          "spriteImg" : "vehicles/common/licenseplates/default/platefont_n.png",
          "backgroundImg" : "vehicles/common/licenseplates/default/licenseplate-default_n.png",
          "fillStyle" : "rgb(0,0,255)"
        },

        "specular" : {
          "spriteImg" : "vehicles/common/licenseplates/default/platefont_s.png",
          "fillStyle" : "rgb(233,233,233)"
        }
      },
      "52-11": { //EU
        "size": {
          "x": 1024,
          "y": 196
        },
        "text": {
          "x": 0.54,
          "y": 0.45,
          "scale": 1.7,
          "color": "black",
          "limit": 9
        },
        "diffuse": {
          "spriteImg": "vehicles/common/licenseplates/default/platefont_d.png",
          "backgroundImg" : "vehicles/common/licenseplates/user_license_plate/user_license_plate_background_52-11_d.png",
          "fillStyle": "white"
        },
        "bump": {
          "spriteImg": "vehicles/common/licenseplates/default/platefont_n.png",
          "backgroundImg": "vehicles/common/licenseplates/driver_training/license_plate_german_new_wide_n.png",
          "fillStyle": "rgb(0,0,255)"
        },
        "specular": {
          "spriteImg": "vehicles/common/licenseplates/default/platefont_s.png",
          "fillStyle": "rgb(233,233,233)"
        }
      }
    }
  }
}
Hereafter the things you need to modify in your file.
- name: Can be whatever you want.
- data section:
- text: Defines the appearance of the text. Change the values for x and y to position the text. Modify the scale factor to scale it and alter the rbg value of color to change the color of the text. limit defines the maximum characters that will appear on your license plate.
- generator: You can define the appearance of your license plate by creating your own html for it and link it here. If you leave this free, the default html will be used.
- characterLayout: Here you can link the json file, which is handling your license plate font. Leave it blank to use the default one.
- diffuse / bump / specular: Hereafter you must define where the different texture files are stored. You can use up to three different map types - diffuse-, bump- and/or specular-maps.
- spriteImg / backgroundImg: Determines which texture will be used for the text (spriteImg) and the background (backgroundImg).
- fillStyle: This defines which color will be used if no spriteImg / backgroundImg file is defined. This can be either a predefined HTML color (e.g.: black, white, ..) or a rbg value.
|
|
Hint: If you've created your own map mod you can create your own default license plate for this mod. All you have to do is to set the name of your license plate folder to the same as the map and rename one of your json files to licensePlate-default.json. Make sure that the path within your files match up the new one. |
Create the jbeam file
{
    "USERNAME_license_plate_2_1": {
    "information":{
        "authors":"BeamNG",
        "name":"License Plate Mod",
        "value":50
    },
    "slotType" : "licenseplate_design_2_1",
    "licenseplate_path" : "vehicles/common/licenseplates/user_license_plate/user_license_plate.json"
    }
}
- Change the part name: First of all change the part name in line 2 to something unique.
- Modify the information section
- authors: Type in the author's name
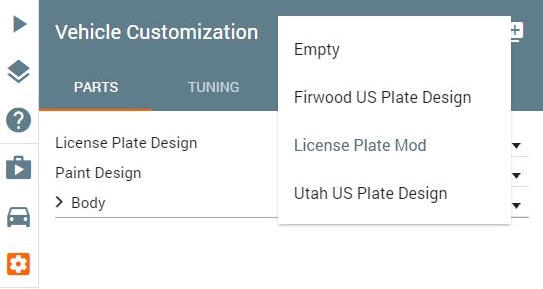
- name: Type in the name of your license plate. This name will appear within the part selector menu within the game.
- slotType: The slot type must be 'licenseplate_design_2_1'. This is the slot name in the root jbeam file of the vehicle. The extension '_2_1' indicates the ratio of the license plate. We'll add more license plates in a prospective update to match up various types of shapes.
- licenseplate_path: Shows the path of the corresponding json file. Enter the path of your json file here.
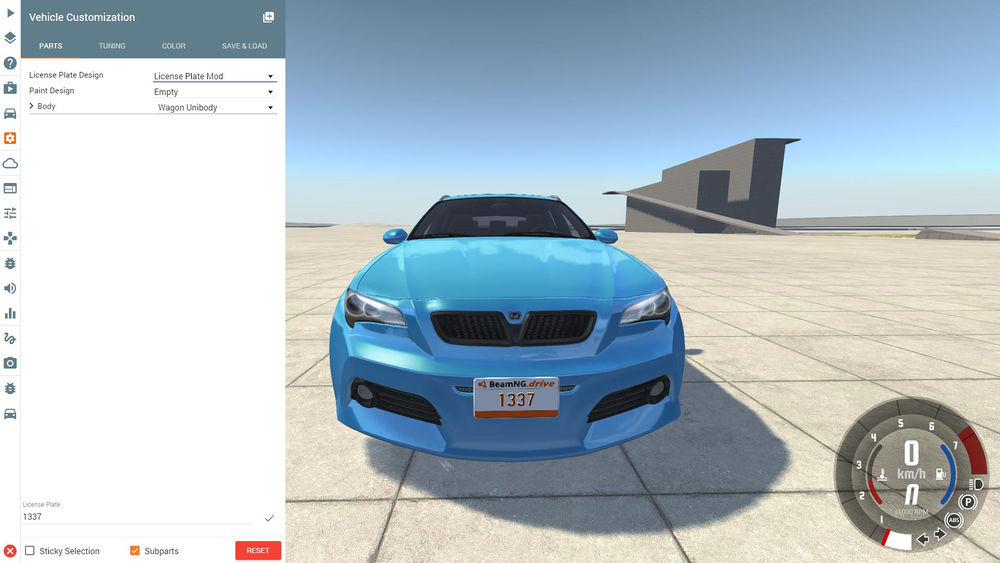
After finishing all the steps, test your mod within the game.
Open up the part selector menu and check if your mod appears.
DONE! If everything is working properly you can zip your mod using the mod manager of the game and upload your mod to the repo -> Uploading Mods
Additional opportunities
Modified font style (version 0.6.0 and above)
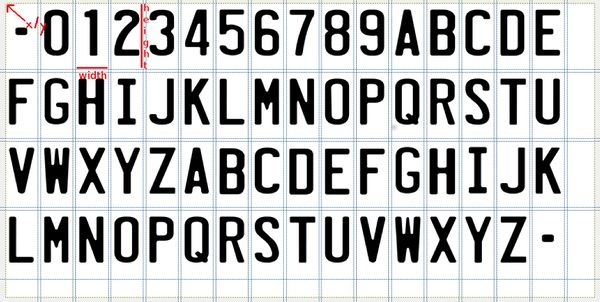
Since version 0.6.0 you can create your own platefont.json file which is managing the characters for your own font. Just copy/paste the default one, rename it and modify it.
The most important part of the file is the chars list. Here you can define the different characters of your font and where they're located on your texture. (You will need the part of the code from "{" to the "}," line for each character in your plate, just place on a new line after "},".)
  "chars": {
    "count": "64",
    "char":
      {
        "id": "45",
        "x": "0",
        "y": "0",
        "width": "56",
        "height": "115",
        "xoffset": "0",
        "yoffset": "0",
        "xadvance": "56",
        "page": "0",
        "chnl": "15"
      },
   }
- count: States how many characters your custom font is containing.
- id: Stands for the decimal value of the character in the ASCII table. To find out which character has which value check this link.
- x / y: Defines the entry point for the character.
- width / height: Defines how many pixels the character embraces.
Licence plate json file version 2
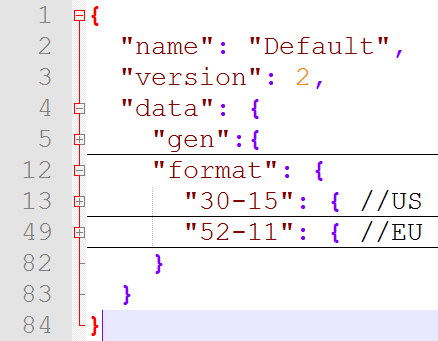
The new format add the ability to define how your License plate skin apply to each format and how to generate pseudo realistic number on the plate.
Inside the object "30-15" or "52-11" is the same parameters as previous version. (what used to be directly inside "data")
Modular plate formats (version 0.15.0 and above)
Before 0.15 the default format is US/NA licence plate 30x15cm.
As of 0.15 a new format was added, EU long licence plate 52x11cm.
Version 1 is still compatible but is limited to only be used on US format licence plate.
Add your own format (version 0.15.0 and above)
Note: Please consider using format that are already included in game if the ratio is close.
You need to do a new mesh, material, licence plate files.
Put them in a folder like so "/vehicles/common/licenseplates/%NEW_FORMAT%/" or "/vehicles/common/licenseplates/%NEW_MAP%/"
The material name need to respect that convention :
"licenseplate-", Width in centimetre, dash, heigh in centimetre , optional country code (one or two letters). The country code should only be used in rare event where a similar format exist but need a different material.
You also need to create a default styling so that maps or styles that does not define your new format will still display something instead of a no texture.
You need to create the fallback file here "/vehicles/common/licenseplates/default/licensePlate-default-%NEW_FORMAT%.json"
Pattern text generation (version 0.15.0 and above)
{
  "name": "Default",
  "version": 2,
  "data": {
    "gen":{
      "pattern" : "BNG*%nb%nb",
      //"pattern" : ["BNG*%c%c%D%d%d","BNG*%c%D%d%d%d","BNG*%c%c%D%d"],
      "patternData":{ "nb":["t1","t2","t3"]}
    },
| Name | Type | Optional | Default Value | Description |
|---|---|---|---|---|
| pattern | string or Array of strings | true | Old generator | This string will be used to know which random character type should be generated. |
| patternData | Dict of array of strings | true | empty | This is used to extend the default random generators. It will pick one of the string in the array if the name of the dict is sued in the pattern. |
In the file above the text generated would be something like "BNG*t3t1"
One of the string in "nb" will be chosen randomly each time it's used. There is no guaranty it will be the same each time.
On line 7, an array of string is used instead of only a string. This way you can generate one of the random format that you licence plate is trying to mimic. For instance this is the format used in german plates.
Default generators
| Name | Regex equivalent or example | Description |
|---|---|---|
| %c | [A-Z] | Return one random capital letter of the latin alphabet |
| %D | [1-9] | Return one digit but zero |
| %d | [0-9] | Return one digit |
| %vid | Eg: 2048 | Return the game engine id of the car |
| %vname | Eg: "sunburst" | Return the jbeam folder of the car or model |


